Showing posts with label Gardening. Show all posts

January 25, 2011

Oh, I have a Wandering Jew Plant? That's great!


I asked my friends on Facebook the other day what sort of new house plants I should get. A few of mine died and I gave a few away so I wanted something new. Someone suggested a Wandering Jew Plant. I didn’t know what that was so I Googled it. Turned out I already had it! I got this plant from my aunt in the summer and just love it but I never knew what it was called so I didn’t really know the proper way to care for it. I did the usual and just watered it and put it in some indirect sun light and it seemed to do amazing. It doesn’t super well propagating and I’ve already given away 6 plants as gifts off of this plant and I’m working on the seventh.

Although it’s doing well I think it never hurts to know a little bit more about the plants you own. I want this plant to live a super long time and I’d really like to keep growing gift plants off of it so here are the tips and notes I found on caring for a Wandering Jew Plant.


How to Care for a Wandering Jew Plant
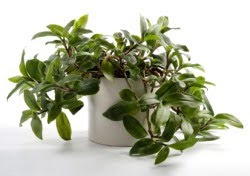
The Wandering Jew plant has leaves with white, silver and purple stripes supported by trailing stems. The stems grow to a foot long or more. Wandering Jew plants will often produce small lightly-colored blooms in spring and summer. Follow these steps to care for it.

Care Difficulty: Easy
Instructions

1) Plant Wandering Jew plants in hanging baskets. The branches will trail down the sides of the pot (I have mine on the top of my water cooler which gives the same effect).

2) Provide at least some direct sunlight every day. Wandering Jew plants do best in front of an east or south window. Lower light tends to reduce the color in the leaves, so placing in one of these windows, will provide a good amount of direct sun for the plant.

3) Give Wandering Jew plants warm temperatures and a good amount of humidity. If grown in a hanging basket, mist frequently and place a saucer underneath the plant. Fill the saucer with water every couple of weeks.

4) Take care to water the plant frequently. The potting mix should be kept moist.

5) Keep Wandering Jew plants in small pots. These plants generally don't need to be upgraded to anything larger than an 8-inch pot. Most times, you'll have to start over with a new plant before needing a pot larger than 8 inches.

6) Prune the ends of the stems frequently. This causes the stems to branch and the plant will become bushy. If not pruned, they will become long and spindly.

How to Propagate a Wandering Jew Plant
The ease of care and brightly colored leaves of a wandering Jew have made it one of the more popular houseplants. Because of its beauty, you may want to have more than one plant around. And with the ease of care, you may want to share it with friends. To accomplish both of these, you must propagate your wandering Jew.

Care Difficulty: Moderately Easy

Instructions
Things You'll Need:
Rooting hormone powder

1) Look for three to five healthy plant tips you can remove from the wandering Jew without detracting from its appearance. Wandering Jew plants regenerate growth where they are pruned in a few months.

2) Cut the portions of the plant off in sections about 3 inches long. The sections must be short because the energy of the plant needs to go to generating roots instead of keeping foliage alive.

3) Remove the leaves on the bottom of the plant and dip the stem in rooting hormone powder. The rooting hormone powder stimulates root development and prevents the stem from rotting.

4) Place all of the cuttings in one 3-inch pot filled with a peat moss and sand or a peat moss and perlite mixture. You'll want to place several in a pot because some cuttings may not survive and you need a bushy new plant. Also, be sure to point the tips in opposite directions around the pot so the stems won't all trail to one side. This creates a round plant.

5) Keep the Wandering Jew propagation in a warm spot where it can receive bright, but filtered, sunlight. Water the new plant when it dries out, but be careful not to over-water because wandering Jew propagation can be susceptible to rot.

6) Wait several months for roots to develop. New growth is a sure sign rooting has taken place. Once the wandering Jew cuttings have rooted, treat them as a mature plant. Propagate several small pots of wandering Jew and combine them into one large pot when they root to create a full hanging basket. (Source)

(with this I also find that you can just cut off pieces like they have noted and put them directly into a pot of moist soil. You can skip the rooting hormone powder which is what I do. I like things to grow naturally with as little interference from me as possible. I find with this plant propagating is super easy. Just keep that new plants soil moist, keep it in a sunny place and it roots no problem)


There were a few more articles that I read but they seemed to have conflicting information so I posted what I found the most accurate to my experience with this plant. Also I would suggest not watering it too often as I’m found it can cause the roots to rot. And I find that if this plant gets totally dry it’s not the end of the world, it’s a pretty resilient plant. Just water it and go on with life. It will be just find.

January 20, 2011

Caring too much for my Jade Plant


Ok so a while ago (I'm thinking it was well over a year) I bought some jade plants. I'll be honest I really didn't know anything about them but that I liked how they looked. I really really liked them and they were growing really well but then for some reason they started to die! I tried to bring them back but it was like they were rotting from the inside and there was nothing I could do. I managed to save a couple of small cuttings before "the death" made it's way through the whole plant. In my last plant love post you can see some picture of them, but I won't even give you an update photo because it's really rather sad. To add to it? I didn't realize these plants could turn into trees and lives for years and years! I was at an appointment the other day and there was a 10 year old jade plant there! It looked amazing!! I was sad that I totally killed mine (normally I'm really great with plants!) but now I have a new goal; to grow a tree!! I know it will take a many many years but how cool would that be? Have a plant that's growing with you! So here are my inspiration photos and for all of you that need a little Jade Plan care tips (apparently I did! I cared too much and it turns out I over watered. And leaving it in the kitchen or near fruit is not a good idea for some reason) here's the best once I've found.


Isn't this one just perfect? I'd love to have a jade plant that looked like this!


(I'd love to get to the point of being able to grow other plants off of my first plant. I love giving plants as gifts!)


The Jade Plant

(Crassula argentea)


* Light requirements - Moderate to bright.
Its recommended to provide the jade plant with direct sunlight, at least four hours daily. Keep the plant 2 - 3 inches away from window glass to avoid scorching it's leaves. The glass can act like a magnifier intensifying the sun's rays.

* Moisture requirements (spring and summer) - Let dry.
Water plant thoroughly but allow the soil to dry completely between waterings.

* Moisture requirements (winter and fall) - Dry.
Jade plants will enter a dormant growth cycle as the days grow shorter. Cut back watering during the cooler months to help prevent rot and leaf drop.

* Soil requirements - pH 6.1 to 6.5, quick draining.
A soil that is quick draining works best for these plants. A commercial mix suitable for cacti and succulents is a good, but sometimes expensive, choice. I've read that cactus and succulent soil mix contains peat moss, sand, perlite, small amounts of lime and sometimes gypsum. A quick recipe is 1/3 peatmoss, 1/3 coarse sand and 1/3 perlite. Perlite is used to help prevent water loss and soil compaction.

* Soil pH requirements - pH 6.1 to 6.5.
Jade plants thrive with a pH balance of around 6.3. A great guide to understanding and changing soil pH can be found here Soil pH - Acid Soil or Alkaline Soil - What You Need to Know.

* Fertilizer requirements - Every 2-3 months with mild succulent fertilizer. Fertilize with 10-20-10 or 5-10-5 ratio soluble plant food once every 2-3 months during the spring and summer months. Use only liquid fertilizer mixed weaker than the directions recommend. Do not fertilize from November through March, the plants dormant cycle.

* Temperature requirements - 55° nighttime and 75-80° daytime.
Jade plants seem to do well between 55° at night and 75-80° during the day. They can even hang in there when temperatures drop to 40° but it's not recommended to allow them to get so cool. They are from south Africa after all.

* Repotting - Springtime, when necessary.
It is recommended to repot in the spring time, when new growth appears. After the winter dormancy period is the ideal time.

* Country of origin - South Africa

*Latin pronunciation - Krass-yew-luh ar-JEN-tee-uh

*Life Span - Perennial

(Source)


You should really also check out the info on Jade plants on Wikipedia. There is a plant that is taller then a grown man! I think it's over 6', amazing!!

September 21, 2010

How To Make Compost Tea!


So now that I'm officially a gardener I was to really get into it and do a good job. So I started my indoor composting, I'll be starting up my outdoor composting right away, and now I'm onto the idea of compost tea. I have to be honest the first time I heard of compost tea was on Twilight when they went on that field trip. BUT I really want to give it a go, so here's a great video for you!

Happy gardening!

September 18, 2010

DYI: Vermicomposting

I wanted to get a start on my composting before we had our house by having something inside. I looked into it, talked to people, read articles, and it seems sort of expensive and hard. Then I talked to my friend Kyle and he said "Get a bin, drill some holes in it, and I'll give you some worms". Of course me being the person that wants more details I asked him all sorts of questions. Sure enough, it's really not that hard, and really not all that expensive. Thankfully I had Kyle to get the worms from, other wise I would have been spending at least $30 on the minimum amount of warms I could find and that would have been way too many for an under the sink sort of set up!

So here is my little DYI on having a mini composting system under your kitchen sink!

1) Get a bin (I got mine at Canadian Tire, $3) and some dirt (Dollarama $1)
2) Drill some holes in the top and sides of the bin (on the sides make sure the holes aren't low down, it could get too full with compost or you could make it more tempting for your worms to crawl out!)

3) Put a little dirt in the bottom of the bin and spreed it evenly.
4) Buy some worms or get some from a friend (complete with a little compost to make it not so hard for them to get used to their new home)

5) Mix them in with the soil a little

6) Cut some strips of news paper. It has to be a sort of raw paper, so news paper seems to be perfect.

7) Put the strips of paper over the top of the worms and dirt

8)Put the lid on and store under your sink.

Pretty easy right?

Depending on the size of your bin (mine's pretty small, but I'm thinking of up-sizing) you may only have to feed them twice a month (I feed mine about two banana peals and a couple of cucumber ends a month and they're happy as can be!)

Some things they really like:
Banana peals
Coffee grind
Cucumber ends
Apple peals
Egg shells (it's good to crush these up pretty good to make it easier on them to eat)

Always keep news paper pieces on top. They eat that as a sort of palette cleanser and it helps them digest everything.

I hope this post was helpful! And if you're like me and would rather see a video to help me really visualize things here are a couple of great ones!

Happy vermicomposting!


I shared this post at: Tutorial Tuesdays

September 11, 2010

Wally Woolypockets? Yes please!


I think these things are my new best friend AND my new goal for a bigger purchase (bigger to me at least). I've done posts about wall plants, and live walls a couple of times because I just love them but I have to be honest I haven't look into how to do them and here we go! Seems pretty easy right?

Don't you want them now too?

August 24, 2010

How to Grow & Harvest Potatos

I'm building my collection of knowledge on all things gardening, prepping (way ahead of time!) for next spring and planting all my veggies! So here's are some videos on potato! Happy Tuesday everyone!

Growing Fruit & Vegetables:
How To Plant Potatoes

Growing Fruit & Vegetables:
How To Harvest New Potatoes

August 15, 2010

If I had a Huge Building & Nowhere to Garden

...I would totally do this! I love these buildings! I don't think we have anything around here (Winnipeg is cool, but I think our winters wouldn't really allow this sort of awesome art) but if we had more heat through out the year I would totally do something sort of vertical garden like this!


August 12, 2010

How to Grow & Harvest Carrots

Now that we're in our house, and I made my garden place (don't worry, I'll post photos soon!) I figured it was time to get in the know on how to do all the sorts of veggies I want to do in spring. In my searching I found these great videos! They have a whole series on pretty much anything you need to know! What better way to learn then by a video right? SO much better then just reading it!


Growing Fruit & Vegetables:
How To Plant Carrots


Growing Fruit & Vegetables:
How To Harvest Carrots

August 6, 2010

Tulip Care

Around Mother’s day I bought myself some tulips (I know, I’m not a mom, but they were on sale, and I wanted some!). They were great for a while, full of flowers but a month later they were done. I realized it was another flower and plant I didn’t know that much about.
They are supposed to be really simple to care for but I thought I clearly missed something.
So here’s another post on another plant I want to share the care on:

Planting tulips
Generally they are planted so the bottom of the bulb is 3-5 inches deep. It doesn’t really matter which side is “up” – the bulb will figure this out in the spring and it will be fine. Do not put fertilizer down the planting hole as it may very well burn tender emerging roots Do add compost around the top of the soil after planting.

After They Bloom
They do not have to be dug up once they are finished growing and the leaves fade. As long as you don’t water them, they’ll be quite happy in the ground. Cut the flower stem to the base where you can see it when the flower fades and the petals start to fall. This stops the flower from setting seed and instead it puts its efforts into building a big bulb for next year. However, do not cut the leaves off the tulip until they start to fade and turn yellow. This is extremely important if you want to see bulbs live from year to year. Those leaves are energy factories and the bulb needs the energy to grow and produce another flower. If you find yourself still having tulip leaves when you want to plant annual flowers then switch to early varieties of tulips that will be finished when it is time to plant annuals.

Do Not Water
Do not water tulips during the hot summer months. They are genetically used to hot, dry summers and cool wet springs. If you irrigate them, you may cause them to rot.

Do Not Plant Tulips Too Early
Another important point in tulip care is to never plant them too early. Try to time the planting so the bulbs are only in the ground for a few weeks before the big frost in your area. If you plant them too early, they may start growing. Once they start growing in the fall, they will either die during the winter or they may live but not flower. (the odds are they’ll die).

After reading the info above I trimmed them down, checked the bulbs to make sure I didn’t rot them out with over watering, and now I’m just wanting to get them outside and planted in the front of my house.

Do you have any tips or special way you care for your flowers?

July 27, 2010

I Have an Odd Love for Bird Houses

So now that we have a house I’m all over doing things in the yard. I’ve written about all sorts of other garden things but now I am trying to decide on bird houses! So here I am with my top picks for a bird house. What do you think? I really like the all wood ones (I’m a sucker for beautiful hard woods...weird fetish, I know) but then a modern one might be nice too...Decisions, decisions.
(These ones above are a great way to reuse some wood that you might have otherwise thrown out right?)
I think these ones are super cool. What a need idea.
And of course, why didn't we think of this sooner? It's for a bird...a bird cut out...duh!
I really like this one, it's sort of tropical right?
I really like these! A little rustic right? Sort of country.
I'm not sure why but these remind me of candy...Maybe M&M's? Yummy!
And of course a classic.

July 23, 2010

Gardening: Aloe Care

I love Aloe Vera plants. My mom always had one in the house ever since I can remember. I love them for their health and medicinal benefits but I also love them for how cool they look.

For some reason my Aloe Vera plant has started to wilt a little. I’m concerned that it’s starting to die for some reason so I figured it was time to get busy and figure out what’s wrong.

My first attempt was a transplant and adding some compost to the soil. I gave it a few weeks, almost a month now but it seems to still be struggling along. So what’s the next thing for a girl to do? Turn to the internet! I like to know as much as I can on all the plants I own so I can care for them the best and most accurate way possible (my plants are like my babies).

So after doing some searching here’s some basic information on the Aloe Vera plant:

“The Aloe Vera's care needs are just that of a cactus. It thrives in bright light so keep it within 5 feet of a east or west facing window. This houseplant also just like the cactus tolerates very infrequent watering. You will only need to water this plant once every 2 weeks.

This houseplant can grow very big, very fast. If the plant begins to outgrow its pot, like it probably will, you may simply transplant sections and place it in another pot with dirt. The plant also does not appear to be very picky about its soil type either.”

Pretty basic right? I’m not too sure what I’m doing wrong, my guess is over watering.

Do you have a plant horror story or any suggestions for me? I’d love to hear them!

July 13, 2010

My Plants, My Love Update

So when I did my last plant post I told you all that I would do an update as my herbs grew...so here you go!

(Above is my Rosemary. Pretty impressive right? No, I didn't grow it from seed. I ended up buying it at Costco and it smells awesome. It cleans the air in my apartment!)

Here is what I think are my Chinese Lanterns (when I got the seeds in the mail there were two packets; I guess I got a bonus pack and after I planted them I mixed them up before I got to labelling)
Do you remember the big fish bowl I had? Well the plants loved it so much in there I had to take a bunch out and fill a whole new potter. I think these looks great in this silver "dish".
This one was the last to pop up...It just needed a little extra time I guess.
I got some new racks too! On the Winnipeg Free day! Pretty nice hey?
Another overgrown plant from the fish bowl. I ran out of potters so I figured a jar would do. I think it looks pretty cool right?

Hope you enjoyed my plants! What do you have growing that you are just in love with?

July 6, 2010

Making Change: Composing


I saw this video and thought it was great. I am yet to have my own backyard, but I'm planning already, and composting is for sure something I'm going to be doing! (if you didn't already catch that from my post on Monday...) I thought this video was super informative and helpful. And composting is just one more step to reusing and working with what we already have! Another step for making change!


I was in Costco the other day and saw this great compost tumbler, it's a good option if your looking!

July 1, 2010

My Attempt at Growing Chinese Lanterns

At my wedding I wanted to have live Chinese Lanterns for my centre pieces. I got married on September 1st and Chinese Lanterns don’t come in season until late September or early October and I wasn’t about to wait any longer to get married (3 years was long enough thank you very much!) so I opted for fake ones.

I found a really great placed called Urban Flora to supply them for me (In case you need to get some yourself!) and the centre pieces turned out really well.

The wedding went off great, all is well and I’m living happily ever after, but that’s not "The End", I still want to have some live Chinese Lanterns. I searched high and low here in Winnipeg but I couldn’t find a place that sold seeds. I ended up ordering some off ebay and they’re growing right along. Still very small, as you can see from the picture (below), but growing none the less.

When I’m in my house I’m going to put them where they want to be (outside) but I thought in the mean time I’d post to you about these wonderful lanterns and how to care for them.

Step 1
Sow Chinese lantern seeds indoors in well-drained soil, four to six weeks before the last frost. Cover seeds with 1/4 inch of soil. Keep the sowing container in full sun. Germination should take two to four weeks.

Step 2
Transplant seedlings outdoors in full sun to partial shade. Soil should be on the sandy side and well-drained. If you have clay-like soil, add garden soil or composted manure and tiny stones to improve drainage. Plant seedlings 18 to 24 inches apart.

Step 3
Regularly water Chinese lanterns in the early morning, about every other day. Watering Chinese lanterns when the sun is too high and strong can cause the plant to burn. Chinese lanterns should grow to a height between two and three feet.

Step 4
Fertilize Chinese lantern plants monthly, if necessary.

Step 5
Cut stems back to ground level in late fall.

June 23, 2010

Picking Blue Bells

So I ransacked a local park a while ago and stock some of their blue bells. I figured they wouldn’t miss them seeing as the park grass was being over taken with them anyways.

I took them home and planted them in a little pot until we got in our house. Thinking that we would be able to just plant them in the backyard somewhere. A couple of weeks later they were all dead, or at least I thought they were (it really just goes to show how little I really knew about flowers from bulbs).

So again with the wanting to know everything about my plants I did some research and i’m sharing it with you:

“Brightening hillsides and fields in spring and summer, Virginia bluebells are one of the most iconic American wildflowers. Gardeners love them because they are virtually maintenance free and attract butterflies from miles around. For added variety, some gardeners choose the Aspen or Alpine bluebell, which can reach 3 feet in height.”

Step 1
Water your bluebells sparingly. Allow the top inch or so of the soil to dry out before watering bluebells when they are in bloom. Once blooms die by the end of summer, these flowers do not require any supplemental water.

Step 2
Spread a 2- to 3-inch layer of mulch around the base of your bluebells. As woodland plants they like cool roots.

Step 3
Fertilize your bluebells in early spring if the soil has low fertility or if you are growing them outside of their recommended growing zone. Use a balanced fertilizer at a rate of 1 pound of fertilizer per 100 square feet.

Sounds pretty easy right? I'll show you my results after I do my planting (in July!)

June 16, 2010

My New Plant Love: Air Plants

Do you know about Air plants? I had never heard of them or even see them until I went with my mom to Shelmerdine’s here in Winnipeg on Monday. My friend Sara always tells me about all the great things she gets there so I had to finally go. It was garden heaven!

Now I don’t have a garden yet, because well, as you likely know we aren’t in our house yet, but I have a sort of indoor garden with the amount of plants I have accumulated and it’s only going to get better! I resisted the urge to buy all of the air plants when I saw them (and my mom explained them to me) but I’m saving up (because they were anywhere from $7-$16 each) and I’m going to get a few when I’m all settled in.
So me being the type of person that wants to know all the details here’s some information on these wonderful plants.

What are Air Plants?
Tillandsia are part of the Bromeliad family, the Genus name is Tillandsia which is also the common name, these are further broken down into species name, most people just call them Air plants. There are over 550 species of Tillandsia (plus many hybrids), that grow in the Mexico, South and Central Americas and there are only 16 species that are native of Florida.


Tillandsias take all their water and nutrients through the leaf system, none or very minimal amounts are absorbed by the root system. This root system is used as wire like anchors to hold onto trees, rocks etc. Since the root system is not important to the plant this can be removed without harm, to make your plant easier to mount. The roots may or may not grow back, either way is doesn't matter to the welfare of your plant.

Growth Cycle
Bromeliad Tillandsia have a life cycle of one plant growing to maturity and blooming. Before, during or after blooming (depending on the species) your plant will start producing young (PUPS), most plants will produce between 2 - 8 pups which in turn will mature, generally within a year and in turn bloom and produce pups. So this year you have one plant, next year maybe 6, the next year 36 and so on. Your plant will actually look better next year than this year as it starts to clump and produce more blooms. The bad news is that each plant will only flower once in its lifetime, but you should have blooms each year as the pups mature, and in turn flower. Flowers can last from several days to many months, depending on the species, most Tillandsia bloom naturally in late winter through mid-summer.
General Info
Tillandsias DO have to be watered, they live 'in' air, not 'on' air.
Tillandsias are NOT toxic to animals, although this does not mean your pet won't eat them, but they will survive the experience, your plant might not.
Tillandsias are NOT parasitic, they do not harm the host tree.
Trim away brown, bent or damaged leaves, this will not hurt the plant.

Main reasons Tillandsias die
They were not initially cared for properly (their owner was told they need little or no water).
They did not get enough light (they were more than 10 feet from a bright window or skylight).
They were placed in DIRECT SUN. Garden windows are generally too warm unless they are shaded or facing north.

They were not watered thoroughly and frequently. (Bulby and fleshy Tillandsias can rot! Drain them thoroughly and water less frequently.)

Tillandsias growing outdoors need more watering than indoor Tillandsias, as the sun and wind dry them out more quickly.Pretty informative right? If you’re like me and really want to invest in these plants go to the source of this info and check out the watering instructions.
What’s your favorate or dream exotic plant?
Watering

Note: I have found that the information below didn't work the best for my air plants. I few of them died and I was told (by the green house staff where I got them) that I over watered them. They suggested just misting them 3 times a week. When I say misty I am meaning similar to what they say below by getting a good amount of water on the plant. You can spray the top and bottom (roots) of the plant and let the water run into the plant along the "leaves" that way it is getting into the plant and can do it's work from there.

Watering is one of the most important aspects of succeeding with Tillandsias, and one of the most misunderstood. Tillandsias NEED water, although they can survive for long periods of drought, they are NOT GROWING and certainly not thriving in these conditions, they are going dormant and just trying to survive.

Your plant will also rot and die if left wet for too long. This means your plant wants water, but needs to dry out completely before being watered again. Plants should be given enough light and air circulation to dry in no longer than 4 hours after watering. It's best to water your plants in the morning so they dry by nightfall.

Humidity is NOT a source of water for your plant. Tillandsias can only obtain their water if it is sat on their leaves, in nature through dew, fog and rain. Humidity only delays the drying process. Tillandsias are covered in suction scales (trichomes) which capture moisture, these scales automatically close when your plant has enough moisture. Get to know your plant, handle the leaves, after watering the leaves will feel stiff and full of water, when in need of water they will be softer to the touch and the plant will be lighter in color. Dehydration can be noticed by flaccid, wrinkled or rolled leaves.

Water Quality
Generally speaking water quality is not important to Tillandsias, they do not tend to show water spots and are basically only susceptible to pH8 or higher, or too much salt. Artificially softened water has too much sodium (salt) for Tillandsias and should not be used as it will slowly cause die back. Distilled water is too pure and will actually pull nutrients out of the plant tissue causing death, NEVER use distilled water. Tillandsia like moving air not closed stuffy conditions.

Watering Schedule

Your plant needs to be watered regularly, at least 2 to 3 times per week. Misting is generally not sufficient even if done daily, they need to be watered (underneath as well as on top) to the point of runoff as though they've just gone through a rain storm, AT LEAST twice a week. The easiest way to achieve this is to actually immerse the whole plant in the sink or a bucket if possible, if not, use a hose or the kitchen faucet to totally wet your plant. Your plant will also appreciate a good soaking for several hours every one to two weeks (although never submerge the blooming flower for more than a few seconds, or the petals will dissolve, of course if you're going away for several weeks it is more important to give your plant sufficient water, than to the preserving of the bloom). Shake off any excess water from fleshy plants. Give thin leaf varieties an extra spray on their tips as they dry out faster.

Tip
If totally confused about whether or not to water, pull at an outside leaf, if it comes off easily it doesn't need water, if its tough to pull off it needs watering. ( NOTE :- Please don't do this too often or you won’t have much of a plant left. )

For even more information check out these links!
Lighting
Temperature
Fertilizing