Showing posts with label Gardening. Show all posts

June 18, 2011

My New Air Plants (yes, again....)

I got new air plants!! I didn't have the best luck with my first set of them and one by one they died off. I thought I was caring for them right but it turns out they do a lot better if you just mist them, instead of putting them in a bowl of water (note to self right?).

My girl friend who is studying horticulture told me that all she does is mist her's a few times a week and she's had it for well over a year...great...and all this time I thought I was caring for them right (what you find online isn't always correct!).

So as they were dying off I was putting the dead one in a bag and kept them in the back of my closet because I was hoping when the place I got them reopened for the season I could get replacements.

My mom had tried to get some new ones (she had the same problem) and they only have her like a 30% store credit of the original cost of the plant. I wasn't too hopeful at that point but I went there anyways on a date day with Marshall and I got all five of mine straight up exchanged. The attendant just told me to go and pick our new ones. I didn't even have to price match to get ones of the same value!

When we were leaving I felt like I had gotten away with murder (plant murder?) and was so excited that I got all new air plants!!

After my friend Sheri had told me how to care for the correctly I tried it on my one remaining air plant and it's worked so far so I'm certain that I can keep these five new ones alive.

And what's even more exciting? Now I have all this driftwood from our road trip that makes a perfect home for these plants!!


This one is sort of a cluster of a few small little air plants. Smaller variations of one of the other plants I have. I think if it grows I will find a way to separate them and maybe give a few as gifts.


(the above air plant was the one I still had. See it's doing pretty good right?)


I'm not too sure if I am going to keep the plants here but I thought I'd try it out for now. I'm loving how they just sit on the driftwood tho. It's so pretty and so similar to how they would grow in nature so I love it.


If you have air plants or are thinking of getting some here's some care info!

May 31, 2011

Little Kid's Boots = Gardening Fun


My mom got me this really cute children s rubber boots from the thrift store a while ago and said "We'll plant something in them, it'll be great!" I'll tell you, I wasn't as convinced as her but now that I saw this photo on fredflare.com I totally see what she means, and I don't have to spend $14 to get the look either!

May 26, 2011

No Patio to Patio, Before & After

Our house is a tri-plex so on the one side is out entrance and the other is the two tenant’s entrance. There’s a pretty big area there so we decided that everyone deserves a little green space so we put in a patio. 
I didn’t so much of the actual work other than making the breakfast, organizing the help and ordering the ¼ down.

I think it turned out great. It’s not being used too much yet but as soon as they have their fence up in front it will be little their own little courtyard. I’m very proud of Marshall for working hard on that and getting it done so quickly. (One of the many projects I had him work on!) 
Before- Just a bunch of grass


We  still need to do the fence but it turned out really well hey? I have a great husband! (& brother-in-law and father-in-law for helping him!)

May 19, 2011

Backyard Still In The Works

After the big sort out last summer and just getting the yard out of it's jungle state we decided we wanted to do a few more things.

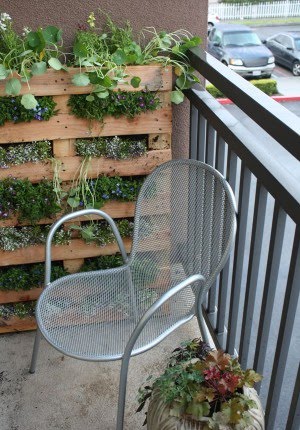
First on the list was for me to get some garden planters. Marshall being the handy man that he is made me some. We started off with 3 and soon realized we'd need a lot more! I now have a total of 7 and am still wondering how I am going to plant everything I want to.

So far I have: Blueberries, blackberries, strawberries, raspberries and I'm going to plant tomatoes, carrots, zucchini and lettuce.  This will be my first go at veggies (since I was little and did it with my mom) so I'm really excited about it!


You'll see from my last post about our backyard work that this area was totally covered in red cedar chips. It wasn't horrible- well I thought it was horrible- but they did a bad job at it and put black gardening mesh down that didn't let water through so this area was not only ugly but a giant puddle every time it rained. It was totally wasted space and you could tell they just didn't know what to do with it. I decided that this would be the best space for my garden so I started the huge task of taking all the chips, roots, rocks and junk out of the space.

I have no idea what they were thinking with what and where they planted but it made no sense. Marshall and I spent hours out there working on the space and now we're at the point of seeding which is so exciting!! 

I bought this Bleeding Heart plant because it's a perennial and I'm trying to stick to those and because it was my great grandma's favorite flower and although I've never met her I'd like to stay connected to my family and my roots. 

I have no idea what this is. As I was digging everything out I found it and thought I'd let it grow and see what it turns into.

Our new sour cherry tree! I can't wait until it starts to product those pretty flowers as it blossoms!

Why the news paper? Well you'll also see in my last backyard post that this house space was covered in ornamental grass. It all had to go but the roots were a pain in the butt out so the most natural way of getting what we couldn't get is to put down 10-15 layers of news paper, wetting it down and then putting soil over top. Pretty cool right? I asked my friend Sheri what to do and being a horticulture students and just plan and simple very smart she had a great and natural answer which I loved. 


Now as I was taking a break from all the hand tilling (I felt like a woman working the fields!) I wanted to get planting along the other side of the house. There is this spot, as you can see, that is ugly and just dirt and weeds. I had already over spent on the plant budget but I didn't want to leave this for next year. I thought about it for a minute and decide to go out and talk to my neighbor that has an amazing yard.

She's probably in her 80s but just loves her yard. I wish I could show you how amazing it is. She has a white picket fence, and flowers everywhere, but not in that overgrown wild flower sort of way.  It's all very well done up with paths and rocks and cedar chips, and it's totally taken care of, not a weed in sight!

So I walked over there and asked her about the ground covered that she had. I wasn't going to straight out ask her if I could have some but she had said that she would give me things as they worked on the yard the last time I had talked to her (but that was almost a year ago and I wouldn't think she would have remembered that). I just asked her a few questions about it and then she said "Oh, I'll give you some, it grows like a weed, it will fill out really fast for you!" Needless to say I was thrilled, no money spent but I got at least $30 worth of plants! And she said when they are splitting things up as they go along they'll come and leave me a note for me to come and pick some things up. I love that!

I already forget what this stuff is called but it's pretty great! I can't wait to show you some photos when it's call filled it! I didn't have enough to do along the gate side of the fence but I'm sure I will by the end of summer! 


Give me a week or so and I'll have more photos for you of how it's all coming along!
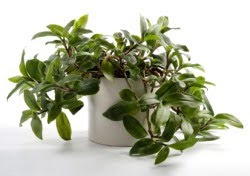
May 6, 2011

Spring Plant Project

Isn't this wonderful? I saw this other other day at Life on the Balcony and I got so excited. I have a back yard now but I have a fire pit area and a patio area where I want to have walls of plants sort of surrounding the area and this is perfect!! I can't wait to try this out when it's nice enough!!

April 2, 2011

How to Propagate a Spider Plant


My mom brought me home a little "baby" spider plant the other day and I didn't know how to propagate it so I looked it up and here's what I found. So far so good!

First you will need to have an adult plant (or mother) with "babies" attached to trailing stems.

You can propagate (or replicate) the plant in one of two ways:
1) either by cutting the plant off and placing it into water
2) or, as is done in their natural South African habitat, you can place containers with dirt to "catch" the baby.

If you select the second method, you will want to hold the tiny plant in place with a hairpin or bent paper clip until it is well rooted.

If you select the first, more common method, you will place the plant in water and wait until it has a healthy root system and then place it into a pot with potting soil. Be sure to place gravel or broken clay pots in the bottom to allow for drainage.

January 25, 2011

Oh, I have a Wandering Jew Plant? That's great!


I asked my friends on Facebook the other day what sort of new house plants I should get. A few of mine died and I gave a few away so I wanted something new. Someone suggested a Wandering Jew Plant. I didn’t know what that was so I Googled it. Turned out I already had it! I got this plant from my aunt in the summer and just love it but I never knew what it was called so I didn’t really know the proper way to care for it. I did the usual and just watered it and put it in some indirect sun light and it seemed to do amazing. It doesn’t super well propagating and I’ve already given away 6 plants as gifts off of this plant and I’m working on the seventh.

Although it’s doing well I think it never hurts to know a little bit more about the plants you own. I want this plant to live a super long time and I’d really like to keep growing gift plants off of it so here are the tips and notes I found on caring for a Wandering Jew Plant.


How to Care for a Wandering Jew Plant
The Wandering Jew plant has leaves with white, silver and purple stripes supported by trailing stems. The stems grow to a foot long or more. Wandering Jew plants will often produce small lightly-colored blooms in spring and summer. Follow these steps to care for it.

Care Difficulty: Easy
Instructions

1) Plant Wandering Jew plants in hanging baskets. The branches will trail down the sides of the pot (I have mine on the top of my water cooler which gives the same effect).

2) Provide at least some direct sunlight every day. Wandering Jew plants do best in front of an east or south window. Lower light tends to reduce the color in the leaves, so placing in one of these windows, will provide a good amount of direct sun for the plant.

3) Give Wandering Jew plants warm temperatures and a good amount of humidity. If grown in a hanging basket, mist frequently and place a saucer underneath the plant. Fill the saucer with water every couple of weeks.

4) Take care to water the plant frequently. The potting mix should be kept moist.

5) Keep Wandering Jew plants in small pots. These plants generally don't need to be upgraded to anything larger than an 8-inch pot. Most times, you'll have to start over with a new plant before needing a pot larger than 8 inches.

6) Prune the ends of the stems frequently. This causes the stems to branch and the plant will become bushy. If not pruned, they will become long and spindly.

How to Propagate a Wandering Jew Plant
The ease of care and brightly colored leaves of a wandering Jew have made it one of the more popular houseplants. Because of its beauty, you may want to have more than one plant around. And with the ease of care, you may want to share it with friends. To accomplish both of these, you must propagate your wandering Jew.

Care Difficulty: Moderately Easy

Instructions
Things You'll Need:
Rooting hormone powder

1) Look for three to five healthy plant tips you can remove from the wandering Jew without detracting from its appearance. Wandering Jew plants regenerate growth where they are pruned in a few months.

2) Cut the portions of the plant off in sections about 3 inches long. The sections must be short because the energy of the plant needs to go to generating roots instead of keeping foliage alive.

3) Remove the leaves on the bottom of the plant and dip the stem in rooting hormone powder. The rooting hormone powder stimulates root development and prevents the stem from rotting.

4) Place all of the cuttings in one 3-inch pot filled with a peat moss and sand or a peat moss and perlite mixture. You'll want to place several in a pot because some cuttings may not survive and you need a bushy new plant. Also, be sure to point the tips in opposite directions around the pot so the stems won't all trail to one side. This creates a round plant.

5) Keep the Wandering Jew propagation in a warm spot where it can receive bright, but filtered, sunlight. Water the new plant when it dries out, but be careful not to over-water because wandering Jew propagation can be susceptible to rot.

6) Wait several months for roots to develop. New growth is a sure sign rooting has taken place. Once the wandering Jew cuttings have rooted, treat them as a mature plant. Propagate several small pots of wandering Jew and combine them into one large pot when they root to create a full hanging basket. (Source)

(with this I also find that you can just cut off pieces like they have noted and put them directly into a pot of moist soil. You can skip the rooting hormone powder which is what I do. I like things to grow naturally with as little interference from me as possible. I find with this plant propagating is super easy. Just keep that new plants soil moist, keep it in a sunny place and it roots no problem)


There were a few more articles that I read but they seemed to have conflicting information so I posted what I found the most accurate to my experience with this plant. Also I would suggest not watering it too often as I’m found it can cause the roots to rot. And I find that if this plant gets totally dry it’s not the end of the world, it’s a pretty resilient plant. Just water it and go on with life. It will be just find.

January 20, 2011

Caring too much for my Jade Plant


Ok so a while ago (I'm thinking it was well over a year) I bought some jade plants. I'll be honest I really didn't know anything about them but that I liked how they looked. I really really liked them and they were growing really well but then for some reason they started to die! I tried to bring them back but it was like they were rotting from the inside and there was nothing I could do. I managed to save a couple of small cuttings before "the death" made it's way through the whole plant. In my last plant love post you can see some picture of them, but I won't even give you an update photo because it's really rather sad. To add to it? I didn't realize these plants could turn into trees and lives for years and years! I was at an appointment the other day and there was a 10 year old jade plant there! It looked amazing!! I was sad that I totally killed mine (normally I'm really great with plants!) but now I have a new goal; to grow a tree!! I know it will take a many many years but how cool would that be? Have a plant that's growing with you! So here are my inspiration photos and for all of you that need a little Jade Plan care tips (apparently I did! I cared too much and it turns out I over watered. And leaving it in the kitchen or near fruit is not a good idea for some reason) here's the best once I've found.


Isn't this one just perfect? I'd love to have a jade plant that looked like this!


(I'd love to get to the point of being able to grow other plants off of my first plant. I love giving plants as gifts!)


The Jade Plant

(Crassula argentea)


* Light requirements - Moderate to bright.
Its recommended to provide the jade plant with direct sunlight, at least four hours daily. Keep the plant 2 - 3 inches away from window glass to avoid scorching it's leaves. The glass can act like a magnifier intensifying the sun's rays.

* Moisture requirements (spring and summer) - Let dry.
Water plant thoroughly but allow the soil to dry completely between waterings.

* Moisture requirements (winter and fall) - Dry.
Jade plants will enter a dormant growth cycle as the days grow shorter. Cut back watering during the cooler months to help prevent rot and leaf drop.

* Soil requirements - pH 6.1 to 6.5, quick draining.
A soil that is quick draining works best for these plants. A commercial mix suitable for cacti and succulents is a good, but sometimes expensive, choice. I've read that cactus and succulent soil mix contains peat moss, sand, perlite, small amounts of lime and sometimes gypsum. A quick recipe is 1/3 peatmoss, 1/3 coarse sand and 1/3 perlite. Perlite is used to help prevent water loss and soil compaction.

* Soil pH requirements - pH 6.1 to 6.5.
Jade plants thrive with a pH balance of around 6.3. A great guide to understanding and changing soil pH can be found here Soil pH - Acid Soil or Alkaline Soil - What You Need to Know.

* Fertilizer requirements - Every 2-3 months with mild succulent fertilizer. Fertilize with 10-20-10 or 5-10-5 ratio soluble plant food once every 2-3 months during the spring and summer months. Use only liquid fertilizer mixed weaker than the directions recommend. Do not fertilize from November through March, the plants dormant cycle.

* Temperature requirements - 55° nighttime and 75-80° daytime.
Jade plants seem to do well between 55° at night and 75-80° during the day. They can even hang in there when temperatures drop to 40° but it's not recommended to allow them to get so cool. They are from south Africa after all.

* Repotting - Springtime, when necessary.
It is recommended to repot in the spring time, when new growth appears. After the winter dormancy period is the ideal time.

* Country of origin - South Africa

*Latin pronunciation - Krass-yew-luh ar-JEN-tee-uh

*Life Span - Perennial

(Source)


You should really also check out the info on Jade plants on Wikipedia. There is a plant that is taller then a grown man! I think it's over 6', amazing!!